

These both worked perfectly and I had everything running except the Budd RDC. This is an indulgence of mine as I really like to see a Budd running around the track. However, it is, strictly speaking, way to long for the curves that I have. This came home to me when it came around the left hand curve. First off, it hit two trees. Then it stopped as it had run its pilot against the scenic bank. Lastly, it stopped because the Kadee uncoupler was fouling the track! I cleared all of these obstacles and then had to tweak the track a little and it was now running OK.

OK, so now I had the railroad running again. I then coupled up JMRI and started moving some points. Acouple were still gummed up from the ballasting but these were easily freed up. Next, it was back to some building for the next scene.
I had on hand a couple of GC Laser kits. One is the extension Icing Platform and the other was the Icing Office for the Ice Shed. What I didn't realise was that the platform was an extension to the main one and that I had missed getting the actual Ice Shed! Humm. So me quick thinking was in order. Anyway, off I went. The Office went together first. They recommend using marker pens to colour the model so I dragged out a red and Sepia marker. This went really well. They also recommend buying some needle tip bottles for apply the wood glue. I have some Titebond here which I bought years ago because that was what Norm Abrams used in'The New Yankee Workshop'. Norm is my hero. I even made oak furniture for a living (well not much of one) some years ago thanks to his programmes. Anyway , I had a look on EBay and bought one for £3.50. When it arrived, it turned out to be 10 of them for the price.

This works brilliantly.You can put down a single spot or a really thin line. Off I went. The construction was very simple and the instructions were a little on the complex side but it all made sense in the end. here are some intermediary images.


Here is the Office complete (sorry about the fence bending buy it is only card so it is a bit flexible).
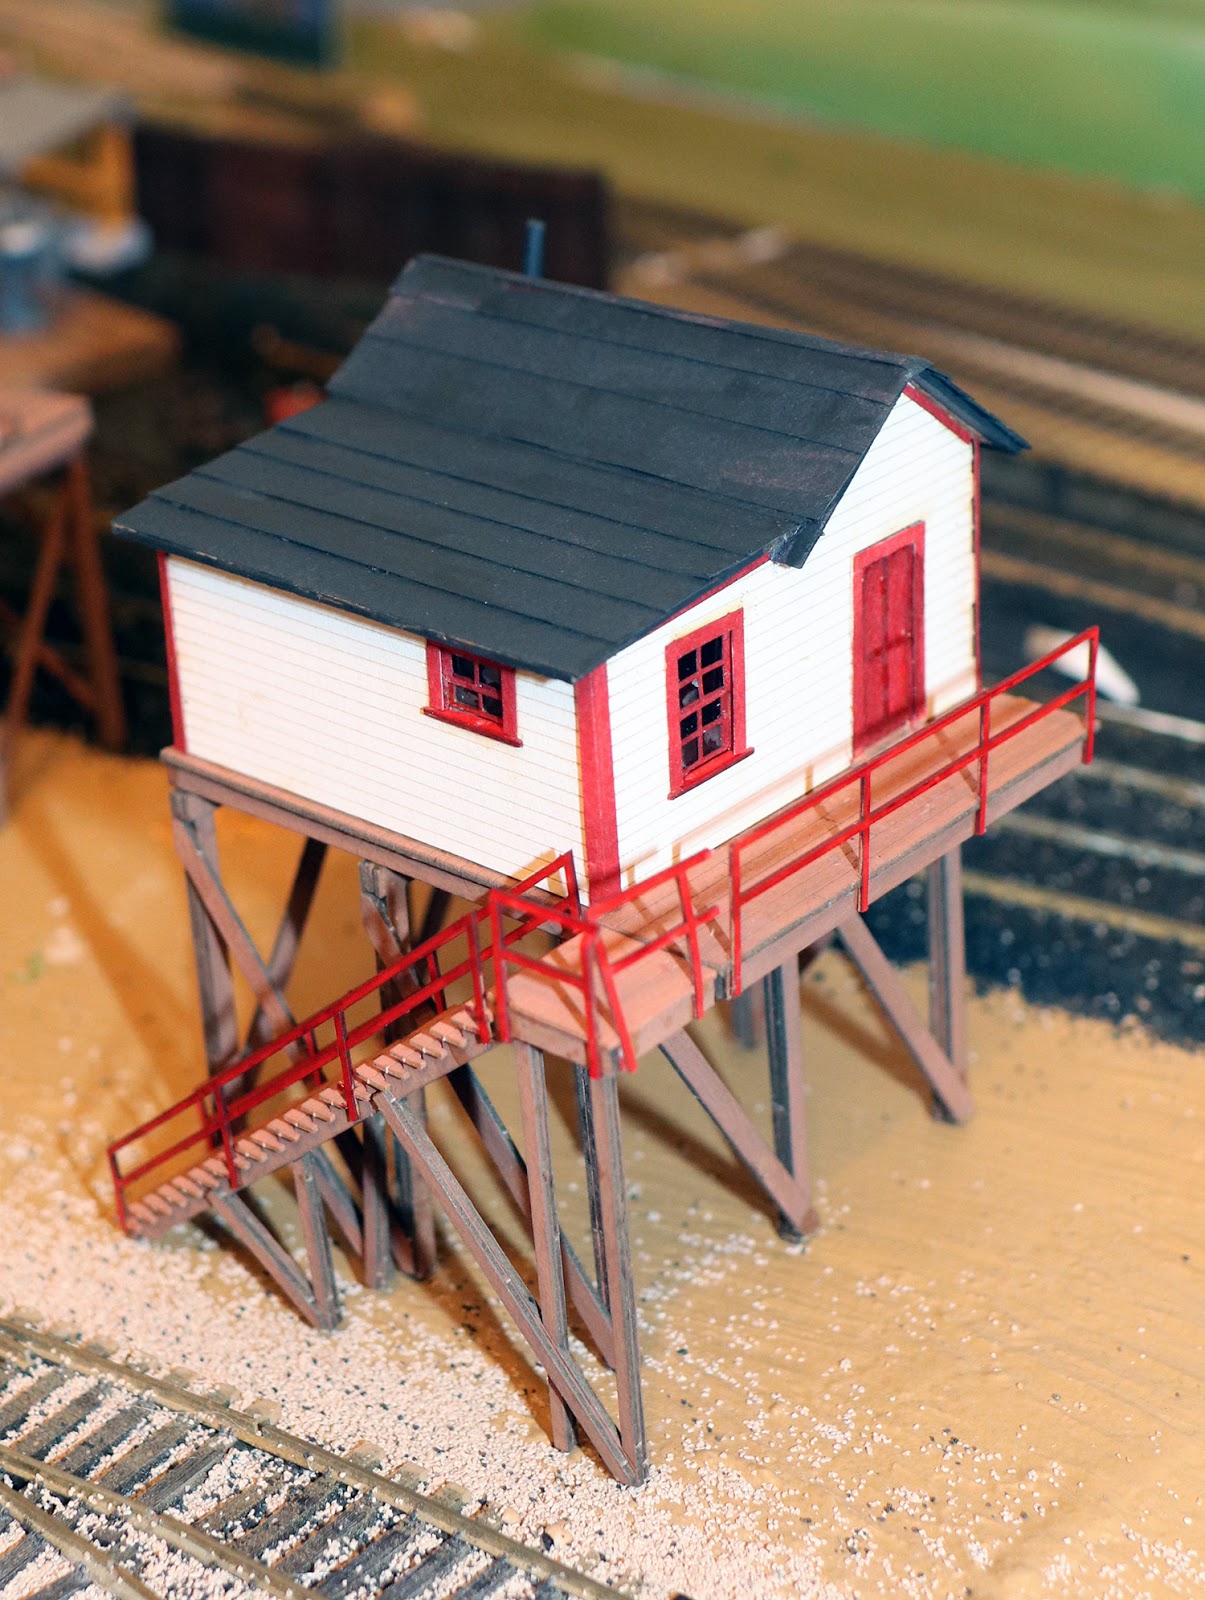
Next came the icing platform and here is where I realised that I had made a mistake. This is designed as an extension so has a part of the platform extended to reach out to the platform proper. This makes the trestles work in place. Without the other platform it looked stupid so I had to do a bit of cutting and shutting to get everything to look right. It was all I could do anyway, as I didn't have room for the main, long, platform. Well, here it is completed - the construction went so quickly that I forgot to take any in-progress shots.

Finally, I have placed them in their intended location. Firstly the air shot which shows the placement.

Then, the moody, low shot to give a feel for the siting.

I think that it looks the part and will look even better when the real Ice Shed arrives. It gives me the opportunity to close off the area between it and the freight house.This will enable me to make a couple of scenarios rather than just one large on.
BTW, I know that the freight house is missing some roof supports. That is one of my next jobs. They are in a pile around the back!
No comments:
Post a Comment