Thursday 9 December 2010

Oh my - I am really getting on

I must have straightened my brain because I am not only spending lots of time on scale models - I used to do 20 minutes at a time - but I am also spending 'hours' on the model railroad. I am amazed to see that it is only 10 days since I did my last blog entry which was discussing the wiring of the main track.

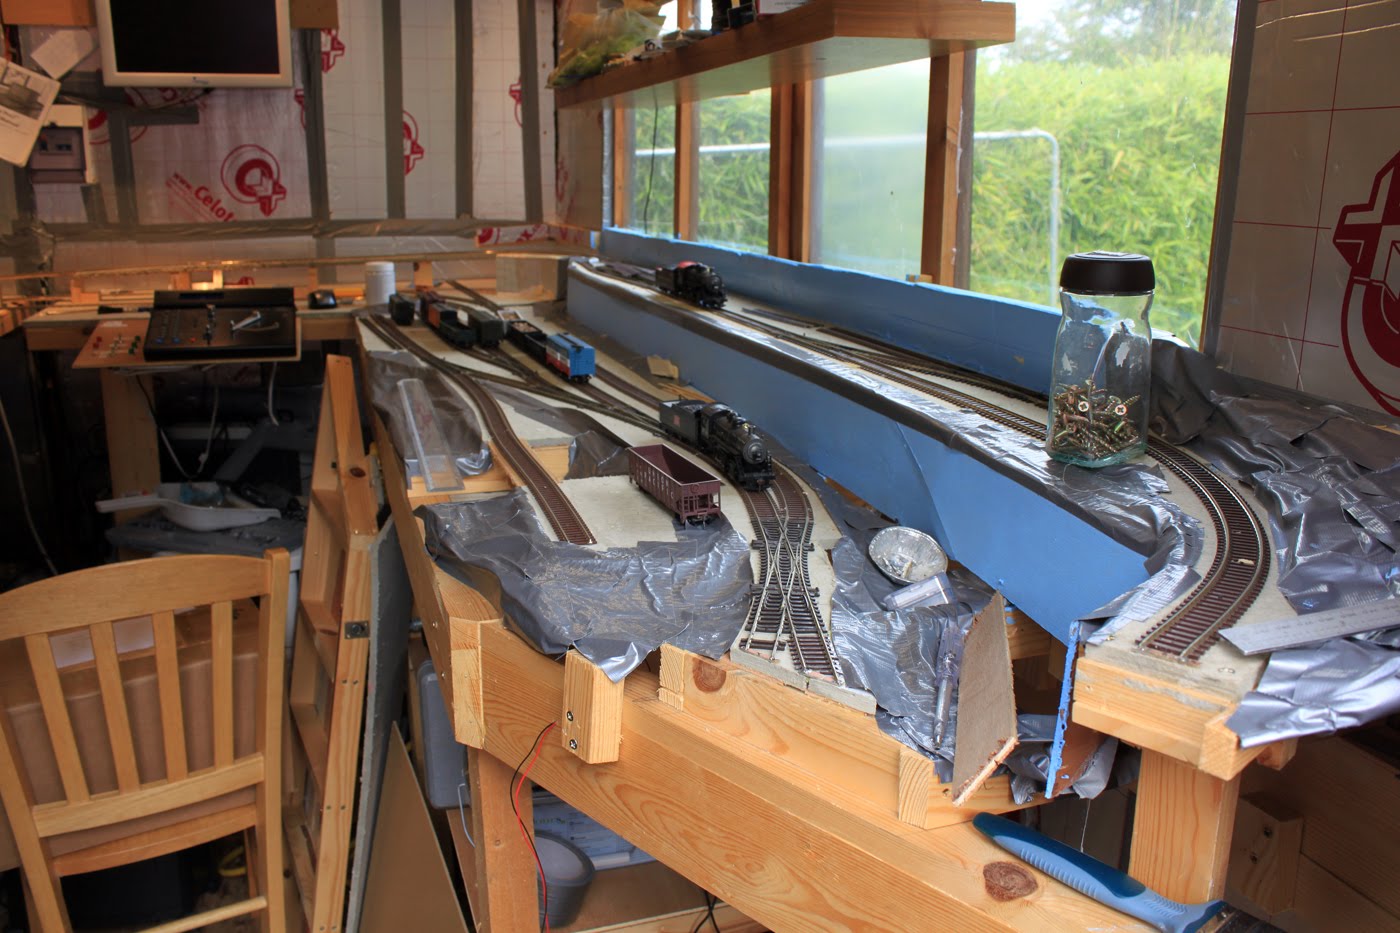
Well, this is where I am now. After some testing, I had to relay one piece of track and I have now built the two end extensions. That to the left is going to be my staging area and that to the right will be where I will eventually put the turntable. However, given the trouble I had with the Walthers one, I am going to construct a very simple one (won't even try to get it to look right - just to turn the locos for now) and eventually fit my dream one - there is a DCC indexed turntable out there which comes built up but costs $350! so that will have to wait :-)

Well, here are the shots of the current state of play.


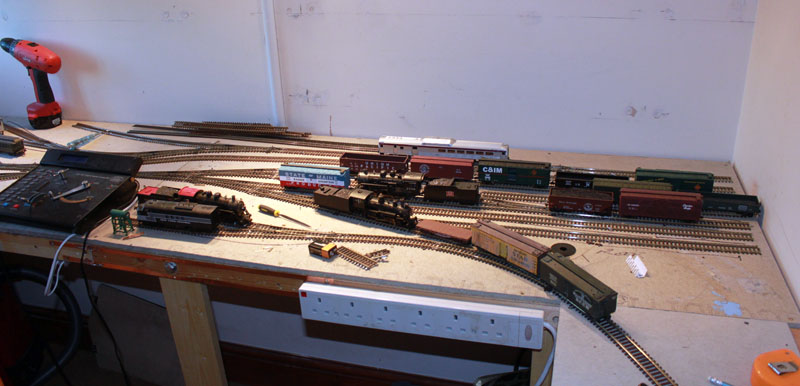
I am close to having all of the track laid. There are just two wires to solder up and we can start thinking about the future.

I will, of course, start to work out the running patterns whilst I start to lay the ballast. I have to remember that this is rundown world so I need to get this right.

Monday 29 November 2010

All Change - forget the shed, it's the spare room now!

For a variety of reasons, I have had to clear the shed of the model railroad. Valerie has insisted that I keep going so I have taken over the spare bedroom, which we only use as a dressing room. It only has a set of wardrobes down one side so we were wasting the space anyway. The space I have is about 7' 6" wide by 2' deep and I can grab a couple of square feet on one end and about 4' x 1' at the other. This means that I can only do the main terminus of my theoretical late '40s short line. Hey, it is warm and I can work there in the evenings so I might just get this one to work.

Progress so far.
In the last two weeks, I have set up a couple of the boards I have salvaged from the shed and worked out a track plan. I have laid all of the track and have spent the last couple of nights doing the wiring. As it will all be DCC, I have set up a power bus using copper tape and tinned copper wire. Here is where I have got to so far. The photos show the situation where I was debugging the wiring. I seemed to have swapped a couple of track polarities as I had to carefully work out what went where. It is all done now so you can see what the wiring looks like under one of the main boards.


Thursday 5 August 2010

So long since anything

I suddenly realised that it is ages since I did anything on the railroad, let alone write about it.

Firstly, I must tell you that 180 people have looked at my YouTube video showing the turntable working - fame at last.


For some reason, even when I have time, I don't go out to the shed. This is in spite of telling everyone for years what I would do if I had a permanent model railroad!

I did get out there recently and started to put some scenery up. I put up some back sheets and painted them a base colour ready to airbrush the clouds. I also started filling in the groundwork. I like to use gaffer tape to do the base work and then fill over that with Modroc (plaster imprgnated material).

In the meantime, I did try to put a couple of point motors onto the hidden siding and then control them from the DCC. I am using Peco surface mounted motors. However, they look a little flimsy to me so I was already a bit suspicious that they might not be powerful enough - even though I am using them on Peco points. True to form, the first one worked perfectly but the second cannot move the rails. I will probably replace both the Guagemaster SEEP motors, but yet again, I have to get out to the shed.

Suggestions as to what is stopping me - please!

Well here is where I am at the moment

Monday 8 March 2010

Ballast and electrics

I spent some of this afternoon tidying up the ballast and then gave all the track a coat of various browns. After a good track cleaning session, the railroad now runs pretty well except for a single dry joint which I will clear up at the weekend.

There is a short video at the bottom of this post.


Monday 15 February 2010

Better scenery

I have now started laying down some scenic effects. I rather lost my way doing this because I realised yesterday that I had intended this to be an industrial layout. However, SWBO (She who must be obeyed) has kept on at me about having 'real' scenery that I put some hills and grass in before I realised my mistake. Now I have a small switching layout with 2 x GE 44 Tonner, running around between green hills. This is going to take some ingenuity coming up with something that makes sense.

Anyway, here are the photos. Some of the effects made from cotton wool need to be coated with ground foam to give them some texture. There is a lot of airbrushing going on here to get the various shades plus the worn look on some of the grass areas.

Obviously, I still have to build the trestle for the Sand and Gravel company that will replace the strip of hardboard (masonite) track board.

The Freight House really is the Bachmann one from the early pictures - do you remember that monstrosity in bright red and yellow plastic.

Don't forget that you can get larger images by double clicking on any photo - if you don't use the Firefox option of a new tab, you will need to do a back page in your browser to get back to the main blog.

Comments would be good here!


Tuesday 9 February 2010

let's get some scenery down

Two major moves forward so far this week.

1. I have built the extension for the left hand 'fiddle yard' or 'Storage Siding' as those in the USA call it, making it sound really boring - smile. I am planning on adding another extension to the right so that I can run trains off the board at both ends. As I have physically run a loco off the end already, this should also preclude any accidents!

2. I have used some plaster/material roll - not sure of the proper name - to get some scenery down. I have down this in the traditional way by putting down some scrunched up newspaper, wetting the roll, and laying it over. Having seen a Woodlands Scenics masterclass on this, I carefully overlapped each piece about 50% to add strength. I then painted the whole baseboard with Timberland Forest Floor dye to get a uniform colour. Now comes the experiment, which half worked and half didn't.

Tamiya has brought out some new diorama texture paints so I got some for the shop knowing that it was best for me to use them first so that I could recommend or otherwise. I used the darker brown earth mix on all of the plaster hills. This is supposed to have a texture to it. It worked quite well but I used nearly the whole bottle on the little I did - the bottle costs £10 ($16) so i won't be using that again! Unfortunately, the flash has washed out the colour so it looks grey, but it is actually dark brown. Secondly, they do a green grass paint which is supposed to have some filaments that give the effect of grass. I have to say that having used it, I couldn't see this effect - it just looked like green paint to me. So that is back to the green flock of old.

So here we are. The railroad works and it has some scenery down. It has the full track layout and one fiddle yard. I am leaving the trestle over the Sand and Gravel pit for now. I ave started planning the industries. i will provide a full list of them next time.

Here is the extension


and now the new scenery


Monday 1 February 2010

All the track is laid

I have now laid all of the track and wired up and tested all the DCC. I had one problem with a dry joint but that was quickly fixed.

I have cut out part of the baseboard to make a Sand and Gravel yard with raised track for delivery by dropping from hoppers. Let's see if I can make a decent job of blending it all in. The hardboard (masonite) trackbed is temporary until I can build the trestle.


In the process of testing, a couple of evenings ago, I ran one of the locos off the end of the track and broke one of the couplers. As these couplers are 'non-working', they would need replacing eventually so sooner will be better than later. I have been pointed at a Model Railroader article which recommends some options.

Saturday 30 January 2010

Fastest Model Railroad Ever!

As part of the shop operations, we became a Bachmann agent but only selling their Dynamis range of DCC hardware. When we eventually came out of the DCC market, we were left with two Dynamis units that had failed. We asked the rep if we could get them fixed but were surprised (and pleased) to get a full refund. This left us with a balance on our account and no real reason to use it. We still get the Bachmann stock lists each week and I noticed that they were just about to release a DCC fitted N-scale GE 44 Tonner in New Haven colours. So I came up with an idea.

"As it is cold in shed", I said to my wife, "Why don't I make a small N-Scale layout that will rest on the kitchen table?". "So you can do that while I do my Latch Hook" was the reply - so off I went.

I ordered a wodge of stuff from Bachmann up to the credit note figure, which got me 2 of the GE 44 tonners, a quantity of freight cars and a couple of other bits. Then the Express bit kicked in.

Monday - I went down to Scograil - my local model railway shop - and bought some track. then off to the wood yard for some 2" x 1". That afternoon, I used up some spare Sundeala board and had the baseboard made.
Tuesday - nothing done because it was the Ipswich Model Club Meeting.
Wednesday - I laid all the track that I had - I now need some more!
Thursday - I wired up the track for DCC (I am using a spare Lenz Compact as a controller).
Friday - I have trains running.

Not bad going! Here as some snaps.


The underside shows the power bus - made from copper tape. You just run droppers down from the track and hook onto the bus. The droppers are all tinned copper wire so it's all nice and easy.

Note to Dan : Nice New Haven colours!

Friday 1 January 2010

Finally got the turntable working

After many attempts at getting power to the track, I finally stripped the whole thing down this week. I put a lot into making sure that everything was right. I threw the Walthers track base away by cutting it out from the two sides of the deck. I then made a new deck out of 30 thou styrene so that I could lay some standard track down. The previous attempt at laying individual rails using superglue was rubbish. At least this way I know that the track is going to stay in alignment.

After putting it all back together again, I still found that I couldn't get power to the track properly and decided that the brass fingers pressing against the two brass collars on the pivot just didn't have enough pressure. I discussed with a friend (Dan) the option of just 'sledgehammering' it by using direct wire connections into a connector block. That way, every session, I could unwind the wires. He suggested using some springs as they do in slot cars. I didn't fancy the work so what I did was to solder a wire from each finger around the collar so that the finger couldn't lose contact.

At last I have something that works - not every time, but if it fails, it seems I just have to do one more round trip and it all sorts itself out.

Don't forget that the whole layout is DCC, so the turning motion is controlled by a DCC chip addressed at 99. I have set the CV for maximum speed right down so the fastest speed you see here is with the controller full on. This also gives me tremendous slow speed control - I can move it by about 1/16th of an inch very easily. I do have a DCC booster that can control the polarity change as the turntable turns automatically but I don't have a suitable cable. Hence, I have resorted to a DPDT switch which I flip with every turn. Fortunately the DCC controller overload protection is excellent so no damage occurs if I get this bit wrong. I will get it controlled properly but I need to get a cable, which is proving difficult at the moment.


Here is the exciting video.