Sunday 30 December 2012

Sunset North Eastern RR N scale - all of the track is down

I have managed to complete all of the trackbed gradients, laid all of the track and converted the Sunset Yard, which was my main board until recently, into a terminus off the new board. As you can see, the new main board comprises two complete loops of the board, which is 6' x 2' 6" ( equivalent of 12 x 5 in HO. These two loops are connected by a single crossover which means that there is only one route from the Sunset Yard through to the staging, which will connect to the main track on the extreme left of the main board. The train will be able to travel around both loops as many times as the timetable requires. There are three stations on the way, all with their own set of industries. One of these does not have a runaround so each industry can only be switched in one direction (there is a reason for this that will become clear sometime next year).

This is a DCC controlled layout so needs a power bus installed underneath. To do this, I use self adhesive copper tape. I then install droppers, using tinned copper wire, from the track to the bus. I install the droppers one side at a time. I lay out all of the locations for droppers on the board and on a drawing and mark them up as A and B. I then drill all of the dropper holes and install droppers just on one side. I tick off each dropper as I solder it to make sure that I don't miss any.

As I have had problems before in getting dead areas or shorts, I install the droppers onto the bus one side at a time. As I will be working with the board upside down, I won't be able to check as I go along so it is important to have a clear check afterwards.

Well here are the shots of the two boards ready to be taken down to install the "A" side droppers. For the keen ones amongst you, there is a YouTube video here.

You Tube Video


Friday 21 December 2012

All of the gradients are now in place


As you can see from the photos, I have now laid down all of the track supports. It all looks a bit nasty and untidy but it is all that a small N-Scale layout needs and it will all be covered up anyway. The plan to start everything from the middle seems to have worked. I laid down the wooden board along the front of the board and that established a level pretty much in-between the baseboard and the highest I needed to give track clearance over another track. This has had the effect of reducing the gradients required down to around 2 - 2 1/2% which is really good on a layout this size. I have had steeper grades before and they always give a bit of trouble. Next step, over the weekend, is to start laying some track.

Tuesday 18 December 2012

Deciding on the track layout for the new board

I have been thinking about what I want from the new main board for my railroad.  I have been working on, as you would say in the USA - or at least John Armstrong used to say - my givens and druthers. These come out as follows:
  • Must have two separate loops around so that I can run two trains whilst I am switching in the main yard.
  • Must be, ultimately, end to end.
  • Must have two towns for Way Freight operations
So this is my first step - I have laid out all of the track using paper templates so that I can be reasonably sure that it will work. It is on two levels, which, of course, I can't do with templates but I am pretty sure that I can do what I want with what I have. Notice that I have laid out the points in their boxes so if I have a point wrong, I can still change it back at the shop.

Anyway, this is where I am at:


Saturday 15 December 2012

Both boards are now up

As you can see, I have fitted the previous board to the new one. There is a discrepancy of height between them. The new addition is set higher than the main board as there will be two levels on the track and by starting in the middle, I can make the resulting grades less than if I had everything starting at the lower level.

The existing of scene staging is a board 3' x 8". This will be added along the front of the main board. This will give me a proper end to end option rather than an out-and-back style.

Friday 14 December 2012

Next baseboard gets made

I was going to finish off the current board before we move and make the main board once we were in our new apartment. We have to be gone by June next year so that seemed a plan. However, I have been thinking about what the next board may be and found that I would have to change the existing boards. Thus I decided that it didn't make much difference when I made the new board.

So I have got on with it. The overall plan is make a new board that is 6' by 2'6" and attach the existing board to it as a terminus. I was intending to do away with the current fiddle yard ( or staging as you call it in the USA). However, I saw how I could meld it all into a single layout.

I will set out the track plan over the next couple of days but in the meantime, here are a couple of photos of the board under construction. As we are in rented accommodation, we can't attach anything to the walls so I have to be careful how I build it to be stable. The answer was to set the board onto an existing table. I have made the framework so that there is an inside run of framing that holds onto the table top to secure it in place. I have then extended the top outside of that with extra framing. As it happens, we bought a new bed frame the other day so I had all the wood from the old bed which included the two main side frames and all the slats from under the mattress. This wood all came in very handy.

Firstly, here is the photo of the framing underneath.


And here is the photo showing the framing all covered in with 6mm MDF

Thursday 29 November 2012

Final cut of the corporate identity

Well after lots of effort and jiggery pokery, I finally have all of my freight cars branded as, I think, they should be. I went for SNRD as a reporting mark for the reefers and I have also re branded the hopper cars. I have to have a small extra go at renumbering the hopper cars as they all have the same number. I did the reefer changes using the white decal sheet with the red printed on it. I did the hopper car finishing touches by using the white sheet but putting the white SNE lettering on the left hand end onto a black square. Once they were matt varnished, the black outline didn't show.

Here is the whole train - it looks very good to my eyes and is good enough for me.

These are the hopper cars - these started out as PRR hoppers with the PRR logo, PRR reporting mark on the left and an orange ball in the top left hand corner. This is how they started out:


and this is how they look now:


and finally, the reefers:


If you really want to see them, warts and all, then double click on any image for a larger version.

Hope you like them because I do.

Tuesday 13 November 2012

Reefers get the corporate treatment

In our supposed Sunset North eastern, one of the main industries is a meat processors called 'Easter Meat Packers'. This is a railroad owned company so should be in some sort of alignment with corporate branding!. I did look up EMPX but that was taken along wth EMPY so I have gone for the EMPZ reporting mark.


These two are decalled up using the laser printed decal sheet. Didn't need the white underlay on these! The red came through really well.

Don't forget that this in N Scale so this is all tiny stuff!

Sunday 11 November 2012

My newly painted roster

Well, here we are - The Sunset North Eastern roster in all its glory!


Saturday 10 November 2012

Getting the decals right.

I did place the red laser printed decals on the locos and cabooses but, as I was warned by Bill Brillinger, the grey showed through. So, I took his advice and had him rustle up some white ALPS printed decals to pace under a second set of red ones. This should solve the problem.

I am in the process of doing this and have all of the existing red decals overlayed with the new white ones.

Here is a photo.


This evening, I shall start placing the replacement red ones over the top.

I shall post the pics when I have some.

Later the same day......

Having tried putting the laser printed red decals over the white, it was generally agreed by the management - i.e. my wife, that the locos and cabooses looked better with the white logo. Off came the red and on went the matt varnish to seal everything in.

So we have now finalised the Sunset North Eastern look and feel. Grey bodies, red ends and white lettering. Looks good to me!

Saturday 27 October 2012

Decals are all ready to go

I finally decided on the branding that I liked. You will see later in the post where I am going with this.

I have finished painting all of the locos and the cabooses (cabeese?).

Here is a shot of the four locos and two cabooses. They have all been coated with Johnson's Klear in preparation of adding the decals.

I went down to my daughter's school this afternoon. She has a very nice colour laser printer/photocopier there. I printed out an Adobe Illustrator page that I made yesterday. This was printed onto a sheet of clear laser decal paper.


Click on this for a larger image. This page contains loads of copies of decals that I need for the branding of Sunset North eastern (note I have dropped the 'and' from the name).

There are decals here for the GP and RS locos, some black logos for the RDC and lots of stuff for branding freight cars and cabooses. Lastly, there are some branding logos for reefers used by the 'Eastern Meat Packers' which is an SNE owned business. I have created a reporting mark EMPZ for this as EPMX and EPMY seem to be taken! On the sheet are lots of serial codes for freight cars and some weight lading details. These are all the same but I will use them on different cars on the basis that the lettering is so small that it won't show.

I am going to start applying the decals tomorrow afternoon so expect to see another post later tomorrow

Friday 19 October 2012

Planning for Industries

Whilst we all ponder the corporate identity, I have had to move on with other things. Actually, I still have to get hold of the laser decal sheets I need so I can't go forward on the loco front for now, anyway.

I am in the process of planning for the industries that are to be in the town. This has two aspects.

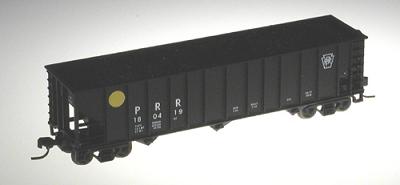
1. Analyse the freight cars that I have to see if
     a) I have the right mix of cars and
     b) that I have some industries for them all to serve.
2. Start planning where the industries will go and what they will look like.

1. Freight Car analysis. As if by chance, this month's Model Railroader - October 2012 has an article about a 1960s freight car roster. In that the author lists  then breakdown of car types and their volumes owned by railroads at the time. I have used this to look at my car mix and came up with the following spreadsheet results:


Total Owned % of Total Type  Actual Total  % of Actual Total Should Have Difference Needed
1 2.70% Covered Hopper  120,000.00 6.27% 2.3 1.3 2.0
0 0.00% Caboose
0.00% 0.0 0.0 0.0
2 5.41% Tank Car non- fuel  153,608.00 8.03% 3.0 1.0 1.0
5 13.51% Reefer  122,000.00 6.38% 2.4 -2.6 0.0
4 10.81% Gondola  240,000.00 12.55% 4.6 0.6 1.0
10 27.03% Hopper  436,000.00 22.80% 8.4 -1.6 0.0
15 40.54% Box Car  706,000.00 36.91% 13.7 -1.3 0.0
0 0.00% Flat Car  111,000.00 5.80% 2.1 2.1 3.0
0 0.00% Stock Car  24,018.00 1.26% 0.5 0.5 1.0
37

 1,912,626.00


8

This analysis showed that I need another 8 cars to keep the ratios right. I have too many Reefers so I have ignored that one.

I then went through and created a list of all the types of industry that could source or sink loads from these types of cars and used that to construct a list of industries that will be in place at Ellerby.

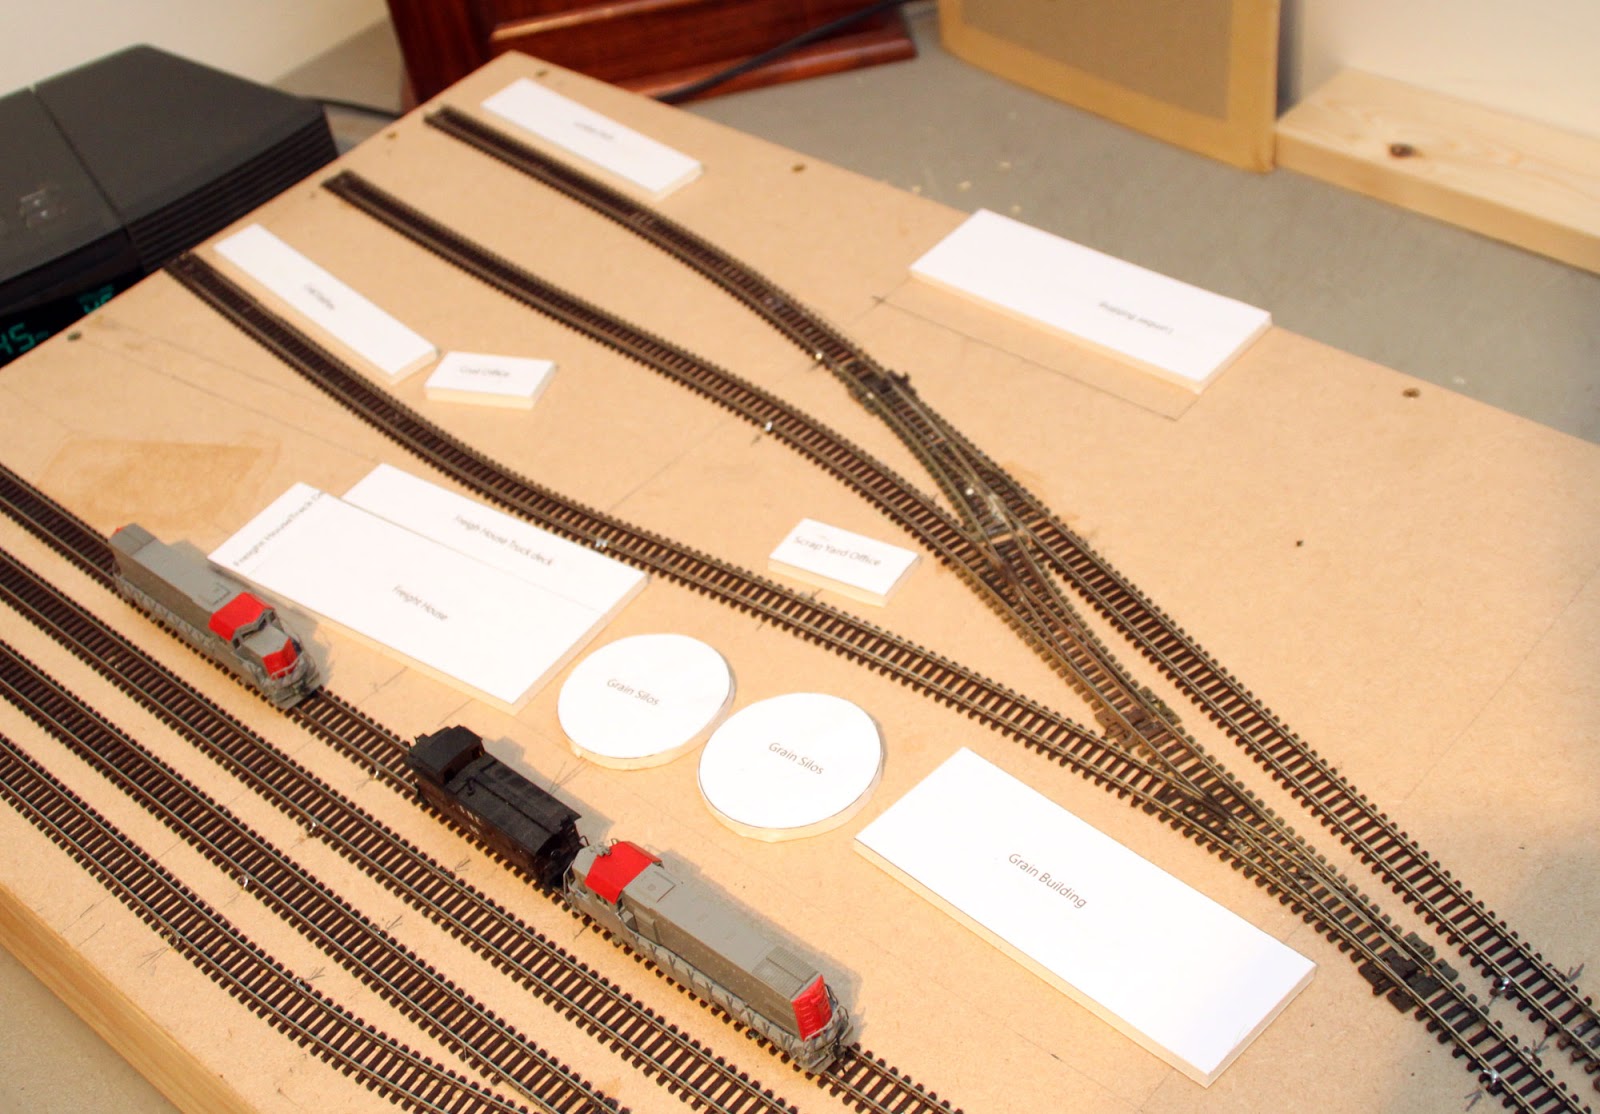
2. Having decided on a finite - but not final - list of industries, I then proceeded to work out what sort of footprint these industries might have. The idea is that, although it may take me many months to build all of the required structures, I can start of with just place holders. Initially, that will enable me to run the trains and see that I have got it somewhat right.

Here is what the railroad looks like at the moment.

Just for good order's sake, the track in the bottom picture to the right of the structure is currently curved but will be straightened to align with the deck of the freight house.


Tuesday 16 October 2012

Corporate Identity

Given that I have acquired my locos without reference to the road names, I now have 4 locos plus a Budd RDC all with different road names. This doesn't matter because I was never going to get any for the Sunset and North Eastern, given that I made up that name in 1970!

My loco roster now stands at the following:
Atlas GP-15 - Union Pacific
Atlas GP-15 - CSX
Atlas GP-9 - Northern Pacific
Bachmann RD-3 - D&RGW
Kato Budd RDC3 - Rock Island

I spent the last weekend stripping down the two GP-15s to their constituent parts, primed them and airbrushed them into S&NE Corporate colours for the mid-70s. I had previously, done a similar job on an Atlas Caboose. I intend to do the GP-9 and the RS-3 in similar colours but the Budd will stay in overall aluminium - I will just change the name down the side. So here is the results on the GP-15s and the caboose. I have yet to put the road names and numbers on them. My daughter has a colour laser printer at her work so I will cadge the use of that to print some decals.


I have mocked some of the ideas that I have for the road name style. Comments would be appreciated.


Thursday 27 September 2012

Hope over expectation

You know when you are cutting corners - well I do - and I was definitely cutting corners when aligning the track across the two boards. I knew what I should be doing but thought 'well, I know it is a bit fragile, so I will go carefully'. Some chance of that - inside two days the ends of the track on both boards were so mashed that running trains across was impossible and no amount of straightening would solve the problem.

This is an example:

Admittedly, this end had yet to be matched to the other board but it shows what happened by just catching the rails. As you can see, one side is bent and the other side has been torn out of its clips.

I knew what I should have done, having been bitten by this before. Given that I am now retired, I have all the time in the world to do this properly, so why didn't I do that? The answer is to cut up some printed circuit board (pcb) into sleeper sized chunks, isolate the ends by cutting a channel through the copper, drilling a hole and fitting the board permanently to the baseboard. Then I solder the rails to the board and the rail ends won't go anywhere! I even went down to the local electronics shop and bought a clean sheet of pcb for the job. Why on earth didn't I do it? There is an old adage about tools - "buy cheap - buy twice". This should be amended to "take a short-cut - do twice!"

Anyway, I got down to the job the other night and this is what the board ends look like now.

This is much more secure. I used a track gauge on both sides when doing the soldering so everything matches up perfectly and the trains run over the gap without any hesitation or bumps.

Job done!


Saturday 22 September 2012

Final Track Layout


Here is the final track layout for the terminal board.

All of the track is laid but only the main yard and the fiddle yard are wired up so far.

In case you are interested, this was drawn in Adobe Illustrator by tracing over a photo of the layout. I stood on a chair and looked down! Here is the original(not full width as the lens wouldn't stretch that far)
I have tried to incorporate most of what should be there in a good freight yard. You come straight in from the main. A switcher takes off the caboose and puts it on the caboose track. It then puts the freight cars into the classification tracks - shown here as sort/store tracks. This releases the loco so that it can go and get serviced. This is done, as explained before, off layout so that it can be turned by the 'big flesh coloured hand in the sky'.

The switcher then sorts out what is needed for the local industries and delivers cars as required. At the same time it collects any cars for onward delivery as loads or as empties.

The main industry will be the coal fired power station which will take at least two cuts of hoppers every day. This should result in 4 or five freight trains a day in and out. On top of these, there is a Budd RDC which makes at least three trips a day into the passenger station. I haven't finalised all the details yet but that would seem to be about right for a single session. Obviously, at times, the RDC will be in the way of the switching which will add to the fun!

Wednesday 19 September 2012

Basic Electrics finished for the fiddle yard

I now have the basic electrics worked out and wired up for the fiddle yard.

The plan was to integrate a programming track into the wiring via a switch.

I use copper tape as my main bus which works very well as you can pick up on it very easily. On the odd occasion (not here but you will see it on the main board) you have to cross one tape over another. For this I use some wide shrink wrap (not shrunk). In the photo below, you can see the underneath of the board.


These strips connect all of the wiring from one end to the other and then to the switch.

OK let's explain what we are doing. I have mounted two phono sockets onto the front edge. One is for the main feed and the other is for the programming track feed. The plan is that the track nearest to the front is to be both a main track and a programming track whilst the others are main track only. Thus, the bus to the left is the bus from the main output of the Digitrax controller whilst the bus to the left carries the output from the slide switch. This switch - see below - controls whether the near track is main or programming. I have cheated a bit with the wiring of the tracks. I HATE wiring up track using droppers. I tend to make a mess of it. Hence, I have wired all these tracks up on the end of the board as follows:


Again you can see the separation between the track that is switched and those that are permanently main track.

Here is the front of the board showing the two phono inputs - man and programming - and the slide switch. The slide switch does have a centre off but that is pretty much redundant.

I have put the slide switch onto a backing of plastic because I knew that my ability to cut into 3/4" wood and get the square hole accurate without machine tools or chisels was going to be nigh on impossible so the plastic covers up all the wavy edges of the wood. Labels are still to be applied.

Next step? Wire up the new track on the main board - maybe tomorrow!

Tuesday 18 September 2012

The plan proceeds - some track down but one glitch!

I have made the new baseboards and fitted them in place. The dowels I have used for alignment work very well such that I don't need any other fitting to make it all work.

Here is what it looks like at the moment.


Don't forget that y can double click on the picture and see a larger version for more detail.

I have got all the wiring in place for the track that is down and I have checked out the Digitrax unit. It is very nice and gives very accurate slow speed control. I have checked out my four locos. The GP9 and one GP-15 work very nicely but the other CSX GP-15 is very stuttery so probably needs its wheels cleaned. Currently, the programming track switch doesn't appear to work so I have a Kato Budd RDC which I can't test as I can't remember its DCC code!

Incidentally, I took the track laying and the wiring very slowly - as I now have all the time in the world for this. The track runs perfectly, even across the gap. I did the wiring in two steps - first one side of the rails and then the other and check both out independently. I managed it without any errors.

The next step is get the programming track fixed. The board to the right is the 'fiddle yard' and can be used either as part of the layout or as one big programming track using the big switch you can see on the front of the board. After that, I will get the rest of the track laid out and wired. I want to get this to the point I can run trains because I am still determined to develop 'Old Bill's Switch List' as a commercial package and need a running freight set up to test it out.

I intend to make most of the buildings from scratch so they will take some time.

I am going to enjoy this!

Thursday 13 September 2012

New Controller

We are very lucky here in Ipswich - well fans of DCC anyway. Close by to me and, in fact, just around the corner from my daughter's house, lives the guy who runs Coastal DCC - Kevin Dickerson. He stocks a lot of what you need - and want (not always the same thing). Be that as it may, he certainly stocks Digitrax, which is my manufacturer of choice for DCC nowadays. I used to 'swear' by ZTC but there is too much history there for me to continue with it so it all went on E-Bay ready for the new beginning.

I have purchased a Digitrax Zephyr Xtra which is described here. The best bit was that I could pop around in the car and pick it up.

It has a similar layout to the ZTC controllers - a decent lever for the speed - a nice reversing and brake lever plus all the buttons for controlling the functions etc. Mind you this controller goes up to function 29 - not something that ZTC can do, although I believe that Neil is working on that.

Here is a picture of it out of the box. More as I go along and learn to use it.


New Baseboard made

I have made the base for the first part of the railroad. I made the frame from 3" x 3/4" planed pine with 1/4" (6mm) MDF top. I don't normally use MDF - my usual base is Sundeala board but this only comes in 8' x 4' boards at nearly £50. I used it because it was designed to take pins and holds really well. However, I found myself hot gluing the track down on the last railroad and that seemed to work well with N Scale so I could economise and buy 2 x 4' x 2' MDF boards at about 1/4 of the cost!

Each of the boards has some M6 T-Nuts underneath with 35mm bolts inserted. These are used to level the boards as I am placing it on a table - given that we are only renting and we have to move again in about 8 months time.

This is a t-nut. You hammer it into the wood (having drilled a clearance hole beneath it). This gives a fitting for a bolt. I can then adjust the 6 bolts on the main board to get it level across the width and along the length. Given that the subsidiary board is connected firmly to the main board at one end, I have just placed two of the t-nuts on the other end of that board.

I have posted the layout for the main board track. The subsidiary board is a 'fiddle yard' where I can build up trains to send onto the main board or receive trains. Part of one of the lines on the 'sub' board will be isolated and controlled by a DPDT (double pole double throw) switch so that it can be powered from the DCC Controller main feed or by the programming track output.

This is what it looks like at the moment. The fixture to hold the two boards together is yet to be done. There are two dowels between the boards that ensure alignment.


I have all the points from the previous layout and a box of 25 yard lengths of flexi-track arrives today so I should be laying track soon!

Just for the record - when we move to the next apartment - next May/June time, it should be the final move for a few years so the grey table you can see will be the base for the main layout and what I am building now will be the subsidiary board. At that time, the connection here to the 'fiddle yard' will be the connection to the main board.


Monday 10 September 2012

Just about to start

I have the mdf sheet on board. I am going out today to get the wood for the framework and tomorrow I should be able to get the baseboards made.

Then, it is back to the apartment and start laying track!

I have two more real purchases - i.e. lots of money - to get.
  1. I kept all the points from my old layout but not much of the track so I have to buy a pile of flexible track.
  2. I disposed of my ZTC controller - too many memories - and am now going to buy a Digitrax controller. I am lucky in having Coastal DCC just down the road from me so I will be able to pick it soon.  I am intending to buy a Digitrax Zephyr Xtra which should provide all I need for running a small N Scale layout.
Hopefully I will have some cobstruction photos tomorrow.

Monday 20 August 2012

I couldn't tell you

why I dismantled the railroad in our spare bedroom. Well it is now public knowledge.

I was selling my cottage and retiring. This meant that I was closing my model business so I had to keep it quiet whilst we got a firm offer for the cottage and it got to exchange of contracts. Well that has happened.

I am moving to an apartment on the Ipswich waterfront - this first one is temporary - 10 months only - and then we expect to move into our permanent home for some years.

This means that I will start work fairly soon on the new N Scale railroad. The current plan is to build the terminal whilst we are in this apartment and then build the rest when we make our 'final' move. This means a 5' x 1 1/2' terminal layout for now and a 6 x 2 1/2' for it to connect to once we have settled.

Here is the back of an envelope plan for the terminal.
 
This still has to be proved for viability - I have a great knack of tightening curves and space between tracks.

The plan is to have this completed as a running system with a little detailing by the time we move again.

Other plans for it:  I am buying a Digitrax controller and looking at putting Cobalt point motors on every point.

This has to be really portable so it should be an interesting build. Mind you, as I am now 'retired' I should have the time - tell that to Valerie - grin.

Monday 6 August 2012

Great time at the Southwold Model Railway Show

We try and go to this every year. It takes place a the beautiful St. Felix School on the outskirts of Southwold. We go there early on the first day, managed to park right close to the entrance - courtesy of my blue badge.

Container Depot
One of the great model railways there was of a modern container depot - along with a working container crane. I took a video just for my friend Dan in Connecticut.


I also took a bunch of photos of what I though were the best things there. You can click on any photo and see a larger version.