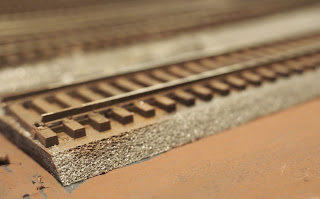
Having put in a DCC bus and a 5V bus, I now needed to connect up all of the track before I start putting the point motors in. The idea was that I would use some clever suitcase connectors that I got from Amazon that have a socket for a plug that lets a new connection to the bus. However, the suitcases needed squeezing shut and the plugs needed a compression on the wire. Both needed a good set of pliers, which I don't have so I muddled through with a pair of adjustable pliers.

I carried on and connected all of the track droppers BUT - they didn't work! It seems that I couldn't cramp them tight enough. A combination of the wrong tool and arthritic hands. So, it was a case of going back to the old methods. I have a large collection of some connectors similar to Waco except that they are grey with orange levers (you can see the pass through ones in the image above). I have these as a 2 wire pass through or single channel 3 up to 5 way connectors. They are a bit messier than the suitcase ones but, at least, I know that they work. After connecting all the track using these, I checked it out to find that a) I had missed a couple of places and b) in two places the wires were reversed! How can you get "black to the back" wrong?
Once I had sorted that out, it was time to go for the point motors.
Fitting the motors
I have had trouble in the past getting the motors securely fastened to the foam core. Basically, the covering of the foam core is just a sheet of paper either side of the foam interior so there isn't a lot of shear strength in it. I cut out some 2mm plastic card to the footprint of the motor and used UHU glue to attach these at each point location. I had previously drilled pilot holes in the card to match the screw locations on the point motors. Once the glue was fully hardened I located each point through the holes in the board that I had made when laying the points. The screws held the points nice and securely so that all worked.
Now, I have never used the Cobalt Analog motors so I made a bit of a mistake in wiring them up. I assumed that the track voltage feed was all that was necessary along with the frog so I wired the track to 1 and 2 with the frog on 3. Wrong! The track goes to 1 and 2. Then you wire the track to 4 and 5 with the frog in 6. If the loco causes a short when passing over the frog, you reverse 4 and 5. That sorted I had a railway that was wired.
I bought a couple of Frog Juicers as I was having trouble getting some of the points sorted but eventually the juicers weren't required.
Adding the Accessory decoders
I use ESU SwitchPilot decoders to run any points that aren't DCC aware. These have to be adapted to operate Cobalt Analog motors as these motors, like Kato points, only require 2 wires and are switched when the plus and negative are reversed. So, we have to add some natty little DCC Concepts gizmos that take the three wire output of the SwitchPilot and convert it to a two wire feed.
As there are 6 points - well 7 actually but two are in a crossover so have the same DCC address - I needed two SwitchPilots. One of these worked and the other didn't. I spent over a day trying to sort this out. I asked questions on the ESU forum and, typically, got no answers. I tried two different SwitchPilots and even replaced them with s TrainTech device and nothing worked.
Finally, I applied a bit of logic and compared the two to see that 1) The lights were on one and not the other and 2) the switch that determines the protocol was on User and not K84. I always thought that User was the right setting but I switched it to the other and all the lights came on.
Finale
Everything worked except one frog feed needed reversing. I have a running layout. Next step is to build a tray to hold all of the cars and locos so that I can put trains together easily on the staging track.


