Sunday, 26 May 2019

Pennstadt/Valdorf and Arduinos

I have added an Auhagen level crossing (Schrankenlage) to the reverse loop as a means of getting from one side to the other. As I have been a programmer for more years than I care to mention, I thought that I could automate it using an Arduino. My son-in-law bought me a set when I retired but I have never seemed to have a reason to pull it out and have a go. This project seemed ideal for it but the box is buried in our storage room. I therefore went to my friendly Amazon account and bought an Elegoo Arduino starter set. This comes with an amazing set of accessories and all for £25. I soon got onto messing around with the Servo and the light dependent resistor (LDR) projects. Once I had both cracked, I worked on putting them together. 

Firstly, here is the level crossing in situ.


The kit comes with holes ready for wires to raise the arms so that wasn't difficult. However, one of the pivot pins broke off so I had to drill the arm out to accept a brass rod. Once they were operating, it was a case of working  out how this all would work. The reverse look only accepts trains in one direction. They comes out of staging, travel around the oval and traverse the reverse loop to enable them to go back into staging. Hence, I only have to manage trains going in one direction.

One LDR is buried into one of the approach tracks, just sitting level with the surface of the track. This is connected to an analog input to the Arduino (using a potentiometer layout if that means anything). This means that the LDR gives a reading of between 0 and 1023 depending upon the amount of light falling on it. This is mapped onto a range of 0 - 179. Originally, I then split the range into 0 - 90 and 91 - 179 with 0-90 being lit and 91-179 being darkness. 

Once the LDR goes dark (a train is over it), the gates lower. When the LDR goes light, the Arduino waits for 5 seconds - to give the train time to cross the level crossing - and the gates raise. The action is all achieved by having two servos attached to the digital outputs of the Arduino.

This works very well and, given that I have never used the C language before, was quite easy to do.  Here is a little demo of the gates before I installed them onto the layout.


The crossing gates are now fitted into place with an Arduino under the table. As I didn't want to use the Arduino that came with the starter pack - it uses jump leads so the connections are not too secure - I obtained a set of three Arduino Pro-Mini versions. This requires that all the leads be soldered in place, which was quite easy - using a flux pen made it easier. Once wired up, the Pro-mini has a mini USB socket for programing.  Here is a run showing it in operation. You may notice a couple of problems!


Firstly, the LDR is mounted too close to the crossing so the gates haven't quite cosed when the loco crosses. This is simply changed by moving the LDR another 6 inches further away on the curve. The second problem is more difficult to fix. It appears that the LDR is very sensitive and is seeing a change of light across the defined threshold when the coaches are passing over it. Fixing this will be an interesting bit of coding as I am going to have to recognise the spurious reactions. I think that it is a case of counting the reactions and if the light threshold is broken for too short a time, then the gates will not move. I am new to C programming (I have been using other, higher level languages since 1976 so I have some learning to do).

If you are interested, the code is available as a PDF - HERE

Saturday, 25 May 2019

Huge progress on the Pennstadt to Valdorf DBB line

I have concentrated on my railway for the last few weeks and have ignored all my other hobbies. This means that I have made some serious progress on all aspects of the layout. I have had one major disaster and one technological triumph (almost!).

Generally speaking, I have been getting on with making the Faller buildings. The main one of which is the Butchers/Bakers (Bakerei- Meztgerei). If you recall, I made this previously but, amazingly, got the N scale instead of the Spur HO version. I have now taken delivery of the HO version and it is completed.


I had some Preiser sitting people for the outside part but the figures on the inside are all these really cheap 50 to a packet of EBay figures from China. They are a bit tiny but it isn't noticeable once the walls are shut up. I have a 1m strip of warm yellow LEDs. There are two good things about these. One is that they are quite bright and the second is that they don't require resistors in the line. They can be cut down just to one LED. I wire them all up to a single 5V supply (A wallwart). I now have all of my buildings it in this fashion, all connected to a Marklin on off switch, as you will see later.

The next item to be completed is the Auhagen level crossing. This is a nice little kit that comes with the gates and a nice keeper's shack. This is perfect for fitting across my reverse loop providing access from the main station/town area across to what will become the fun fair. I was wondering about motorising the gates when someone suggested that I should have bought the Faller version which, I think, comes with a motor. However, I wanted some more logic than that. I went down the route of using an Arduino. I will cover this project in my next blog post.

What I wanted to have was a fully lit town, especially as I have a plan for a fun fair. Hence, every building has a set of LED lights. The goods yard is lit with tall double lamps and the streets are lit by more decorative items. These are all wired up to a single switch on the fascia. As the railway is in our bedroom, I have got into the habit of putting the lights on when we turn the bed down and my wife enjoys looking at the effect. It is enhanced because of the wardobe mirrors which make it all look much larger. 


One of the nice things, when the wife is in bed looking across at the railway, is the wardrobe, sited as it is alongside one end of the railway. The doors are mirrors so  she can see the whole railway, with its lights on.


Lastly, I have caused an expensive little problem. The problem came from the placement of the semaphore signal that I had protecting the yard entry point. It worked very well. It meant that I could bring the shunter out onto the main line when required without risking a train on the main line hitting it. It was a Marklin 703891 home signal with lattice mast. It was placed right on the front of the layout and, when reaching across fitting the Faller buildings in place, I knocked it and broke the wire connection. This was OK-ish, because it still worked electronically, even if the arm didn't move. On a second occasion, I gave it a whack and broke the arm off.

I decided to replace it but with a 76491 Single colour light signal. I ordered this last Monday and DPD delivered it at 8.30 on Thursday morning. How is that for service? This is better because it fits under the track and isn't glued in solid. As the track at the front is where all the connections are fitted, the track isn't screwed down so, if I do give it a nudge, it leans nicely!


If you look carefully in the picture of the wardrobe, you can see the spot of green in the mirror.

In fact, I have got into the habit of looking in the mirror to check the status. It is easier that bending my head over to look at the actual signal.

Things are moving on too quickly so I must take a break from this. I am enjoying it too much but it is a restricted size so has limited amounts that can be done. Mind you, I have plans to build a fun fair in the area the other side of the level crossing and to add a cliff against the removable staging to hid that when fitted.

I am so glad that I chose Marklin!

Wednesday, 1 May 2019

More scenery goes down

I have never done much sceniking so I have taken lots of time to get the base works done. I have found that, once there was a basis, I could get some detail in quite successfully. I have a couple of drawers full of Woodland Scenics stuff so it was a case of using a range of their products across the board.

Having put lights into the main buildings, I then went on to put street and yard lights into the system. I had reason to move the baseboard out away from the walls - a van had come off the tracks in the tunnel. The board is designed to cope with this type of action but in the process, I pulled a lot of the lighting wiring off. I had done a bit of a kludge with the wiring to this point so it was a good excuse to crawl on the floor and rewire everything. This is not something that I take to lightly as my arthritis allows me about 1 1/2 minutes under there before I have to lay down so it took a good deal of time to do. Previously, I was soldering the connections and then covering them with heat shrink. I have found a gadget for making these connections which doesn't require that I have a soldering iron plugged in.

This is the connector:

You insert the first wire in one end and crimp it. The second wire goes in the other end and gets crimped as well. Then - and this is the good bit - the ends are heat shrunk. I have a new mini blow torch to do this.


You push the button on the back and it fires up. It is very easy to control. I heat both ends and - bingo - the wires are secured. When finished, you rotate the button and that turns off the gas.

Using these tools and fittings I was able to rewire all the lighting successfully.


I have then done a lot of work putting bushes, etc. into the areas that I had built up as hills. I wasn't happy with the edges of the hills so these bushes cover them nicely. Additionally, I bought a box of Nuch walkers that have been sprinkled around the hills.


My current task is to build an Auhagen road crossing. I intend to make it work using an Arduino board using servos. I have the prototype Arduino sketch working. I am just waiting for some more servos and some circuit board to arrive to get the whole thing working. IT is going to be fitted across the reverse loop in the middle of the board. The idea is that a photocell will detect the train and close the gates. Once back in the light, the Arduino will wait for some seconds before closing the gates. It is a simple piece of programming. It could be more complex but I want to keep everything simple nowadays.

My next blog should show the gates working and I will also be covering the software that I have written to provide train consists.


Monday, 8 April 2019

Lighting and a new controller

New Controller

I do some programming work for an insurance company in the USA. I have just completed my recent tasks and, thus, have received a payment. Some of this has gone towards purchasing a new controller. Having had a bit of a bad experience buying 2nd hand, I thought that I might buy a Marklin CS3 but then I was bothered if anything went wrong, I would have to return it to Germany. I, therefore, decided that I would purchase an ECOS from Coastal DCC, my regular DCC suppliers.  I realise that Kevin of Coastal would have to send the unit back to ESU if anything did go wrong but at least I would be dealing with someone that I know and trust.

I am extremely happy with the unit. I have just said to my wife that I think that it is the best DCC controller that I have ever had. It was extremely simple to set up. One of my locos was missing in the built-in lok list but it was very easy to download it from the ESU web site. Having entered all of my DCC points into the controller, I can now operate them using a touch screen and without having to remember their code numbers. I know that I can do this with JMRI but my wife has banned any computers from the bedroom so I have to find other ways. (I haven't explained to her that the ECOS is just a Linux box in disguise but...).


Lighting

As this railway is quite compact and is, what I like to refer to as, a "Train Set", I am trying to make it have a bit of life rather than being a serious model railway. One way to do this is to install lighting so that we can run dusk and nighttime sessions. I have shown how I have been building little circuit boards with LEDs attached. This is OK but a bit of a faff making them every time that I want to light something. I now have a solution.

I wanted to light the carriages but didn't want to spend £20.00 on each carriage by using the Train-Tech units. These are very clever but don't light u until the train moves, which doesn't strike me as too prototypical. I found a company called Layouts4U that have lighting units at just £6.00. These units come with an LED strip, some wires, a battery and a reed switch. You install the reed switch in the roof of the carriage along with the LED strip. Wave a magnet over the roof and the light comes on, wave it again and the light goes off. Brilliant!


I have fitted a set each into two of my Rheingold coaches and then tackled the little four wheel local carriages. I found that, as they were quite short, I could cut the strip and light two carriages with one set. There are two tiny black wires that go from the controlling carriage to the slave.

I have now ordered a 2m length of LED strip and am going to install some into the new Goods Shed. Having 2 metres of this will mean that I can light all of my forthcoming buildings easily. They can all be connected to my under-board lighting circuit and be switched from the front panel.

In addition, I have bought some street lighting and yard lighting from Amazon at not much money for 10 of each. These also get wired into the lighting bus. The stations are lit from the street lighting and the yard has some taller double lights. Should look great when I switch it all on.


Buildings

I have been on a building binge. I talked about both of the stations in the last post. Since then I have bought two houses, a Bakery/Butchers (Bakerei and Metzgerie) and  a fun fair! The fun fair is to go beyond the reverse loop whilst the houses are for the station area. One big mistake. I was happily building the Bakery when I wanted to place some people around it. The people looked very tall and I found out that I had bought, and spent 7 days building, an N scale model! My wife likes pretty things so it has gone on her shelf and a replacement kit ordered.


Signals

I nearly had a crash on the railway a few weeks back when I was trying to shunt some wagons in the yard and run a train around the outside. Some yard operations require coming out onto the main. I did this and had a great fumble trying to stop the resulting mayhem. I thought about this and decided that a signal was the way to go.  On my next order with Lippe, I  placed one for a Märklin 70391 Home Signal with a Narrow Mast. This is a digital signal and incorporates a feed to the track that is under its control. I also ordered the bits to make the point onto the main be digitally controlled as well. I gave the point and the signal the same DCC address (well Märklin MFX address) and now, when I switch the point, the signal goes to danger and it removes power from a length of track running up to the signal. Switching the point to the main puts the signal at clear and power is restored. That keeps everything tickety-boo.


How is it so far

Everybody tells me that this is the best railway I have ever built which I agree with. It is great fun just to switch it all on (thank you Alexa!) and run some trains for a few minutes and then turn it all off again. I have avoided building a plan of the railway on the ECOS because that is getting a bit too close to JMRI. I can't see how it will keep me going for years but then its life is dependent upon the room that I have to use so who knows what is going to happen and when.

Thursday, 7 March 2019

Scenery and stock

I am trying to move forward in a controlled way. Rather than just doing one thing, I am spreading my time around to get a few things done in a longer time. This means that I am building station buildings, making scenery, completing the track plan and extending the capabilities. \one at a time\;

Building Station Buildings

Over the last few weeks, I have picked up a couple of building kits - one from Kibri and one from Auhagen. The Kibri one is actually a Swiss example but it was on sale at a good price from my local hobby shop (Scograil in Ipswich). The interesting thing was that it stated that it came with lighting. Well, more of that later! The other building was added onto an order from Lippe Modelbahn in Germany as an add-on to an order. They were both nice kits to make but not up to the standard of the model aircraft or cars kits that I normally make. Instructions were fairly sparse. Working on the basis that I am building a "train set", I built them out of the box, using the fact that they are pre-coloured plastic to avoid doing any painting. Valerie liked the Auhagen kit as it comes with flowers for the window boxes!

They went together OK but there are no alignment pins or such so you have to be a bit carefult. The KIbri kit was a bit of a cheat in that there were 12 light boxes to fit around the windows but only one LED! It seems that you need to buy a set of Veissmann LED fittings to make it fully lit. 

Firstly, here is the Auhagen kit made up.


This had nice little appropriate printed sheets to fill in the windows.

Secondly, here is the Kibri kit.


The images provided for the windows were completely inappropriate so I printed up a sheet of light yellow and filled the windows that way. As there was only one LED fitting, I decided to make my own.


I made up twelve of these to shine through the windows. They are all connected to a Marklin 72730 switch box (kindly provided by my Marklin friend, Adrian). In fact, I am so pleased that I am buying some street lights to complete the scenes as the switch box will manage four blocks of lights.

Scenery

To avoid both ends looking like a toy train, I decided to have one end encased in a tunnel. First off, I built an enclosed tunnel from 5mm foam core. I then fronted it with some sheets of polystyrene foam which I carved with a hot wire. The top was filled in with crumpled Amazon brown paper(!) and covered with plaster bandage. Then the whole shebang was coated with a thin coat of Hydrocal. Lots of various greys and white has resulted in a nice rock face. I have some mountain climbers to add to this sometime! I then dragged out my trusty box of trees that have graced lots of my railways over the last few years plus a few built from a Woodland Scenics kit. I don't think it looks half bad. It nicely mutes the sound of the train (and the whistle) as it goes through.


There is a nice painted backscene to go behind this but, after being taken from my old railway, it needed some careful touching up by my tame(!) artist, Mark. He paints in oils so it needed a few days to dry so that will appear in the next article.

Track Plan

There is an extension to the main board that fits between it and the wardrobe. This extension has three legs (one folding). This extension will become the "fiddle yard" or staging area.  I will be putting the extension up next week so I will take some photos then. In the meantime, this is final track plan, as drawn in SCARM.


All of the points that are on the back of the board are controlled by DCC/Electric set ups. Again, more of that later.

Rolling Stock/Loks

I have learned to call my locos 'loks' in the German manner. I now have four locos. Here are three of them.


These are a Class 94, Class 23 and Class 24. I love the red contrast against the black. I have one more loco - a Class 78 but the decoder has failed so it is off being repaired!

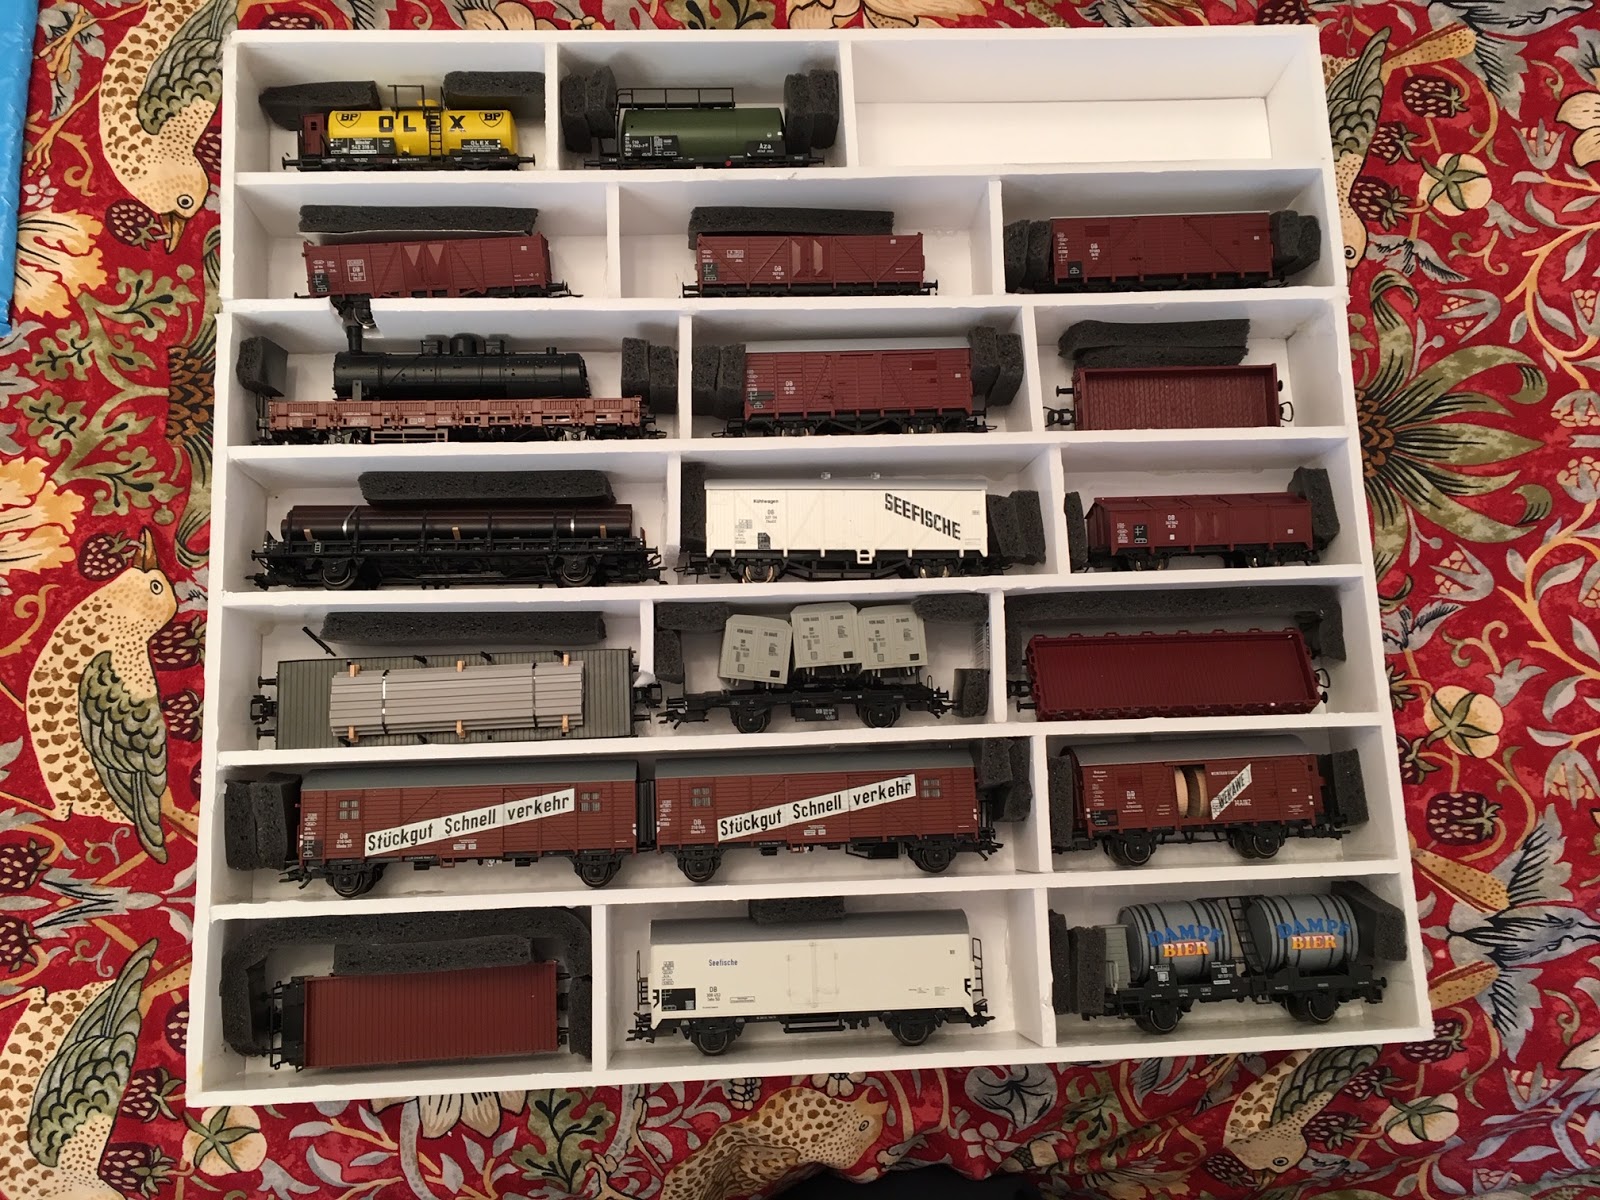
I have quite a good collection of rolling stock, including a fabulous Rheingold set of 6 passenger coaches. However, I don't like keep taking them out and putting them back into their boxes so I have built a nice double decker carry tray out of my trusty 5mm foam core.


The black strips of ribbon help in getting the items out of their boxes.

Next Time

Photos of the extension board, another new loco, a working signal and street lights plus a new controller! I can't wait.

Tuesday, 19 February 2019

The hills are alive with the sound locos!

Well, with four locos that have sound fitted, it can get a bit noisy. Actually, running is on hold until I get the last of the track, which should arrive tomorrow. Once that is here, I can finalise the fiddle yard and then start panning the traffic, etc. I am beginning to think about a little web program that I can run on a browser to organise the traffic. Valerie is raising her eyebrows saying "I thought that you weren't going to get the computer involved" but I can't see a better way to do it.

Here is where we are at the moment. The hillside over the tunnel is pretty much finished except for forestation. I need to buy a small supply of miniature trees - they give the impression of distance - but that will have to wait until my next budget run - early March! I have managed to get the cows in, which Valerie likes. However, I am planning to put a Faller fairground in that area so we shall see how it all ends up.


I have made up some trays for the freight wagons. There are actually two trays so far.


That's about it for now.

Monday, 11 February 2019

Pennstadt is my new Märklin train set!

Firstly, an update on the previous post. The Lenovo laptop didn't work out. We now have a very good Dell laptop. Mind you, it was very slow until I replaced the 4GB of memory with 16GB and also took out the hard disk and put an SSD in. Now it roars along. Secondly, I did build the baseboard out of foam core but strengthened the underneath with a sandwich of 3 layers and beams rather than box sections.

I now have the baseboard finished and the track laid. I was very lucky as I mentioned on the Märklin forum that I was planning to buy all of the track and had an offer from a local chap. This offer was for a mix of new and used track and was generally around half price. I now have the layout down but I found that the board was a bit too deep to reach over easily. I have had to disobey my wife's request that it all be run manually as I have installed point motors and digital controllers in the points on the far side of the board.

It got even better as,  when I mentioned that I was going to extend the rolling stock with some purchases from Germany, my new friend who sold me the track made me an offer of two locos, 6 coaches and a pile of freight wagons, all at exceedingly good prices. I also picked up some local coaches and a collection of freight cars from my local hobby shop (LHS) Scograil. He doesn't sell Märklin but Roco cars work perfectly fine. As a result I now have four locos (or Loks as I am learning to call them), six mainline coaches (Rheingold express), four locos, four 4-wheel, coaches, around 20 freight cars and a few kits for stations and so on. More than enough to be getting on with.

The locos are: Class 23, Class 24, Class 78 and Class 94.  These numbers don't mean much to me at the moment but I am learning.

Photos

First off, a panoramic view of the layout:


Locos

Class 23


Class 24


Class 78


Class 94


Class 23 Train and Class 24 (in the background)

(with only 2 out of the 6 Rheingold coaches)


The box below, with the lights, is the control box for the uncoupling tracks.

Interim Tunnel and cliffs


What Next?

I have to complete the tunnel and scenery around it. I have kits for two stations that need to be made so that I can think about the rest of the towns can be created. I need to get some freight wagons onto the layout to get a better idea of how traffic could be run. Once I get the last point motor, I will be able to create the "fiddle yard" - or "staging" off the right hand end of the layout. Once this has been done, I  will be able to think about the total traffic flow. I can't wait!